We know you are in pain, and you want to get rid of it forever. The good news is that you can accomplish this goal naturally with the help of specific yoga poses. We will share some of the best yoga poses that will help you strengthen the right muscles to fix the pain in your lower back and hip. Weak hip muscles are often the cause of prolonging lower back pain. We will try to curb the issue by helping the muscles move and release the build-up tension. To find the best yoga poses for hip and lower back pain, continue reading. So without wasting any more time, let’s get started!
Can yoga help relieve hip and lower back pain?
Yes, yoga can help with hip and lower back pain. It is a natural and gentle practice that is ideal for maintaining back strength and overall health. Yoga poses like a low lunge, supine twists, bridge pose, and others can help improve mobility in the lower back region of the body. When coupled with effective breathing techniques, yoga can successfully provide relief from lower back and hip pain.
9 Best Yoga Poses for Hip and Lower Back Pain

Now that we are well acquainted with what yoga can do to your body, let’s discuss some of the best yoga poses to cure hip and lower back pain.
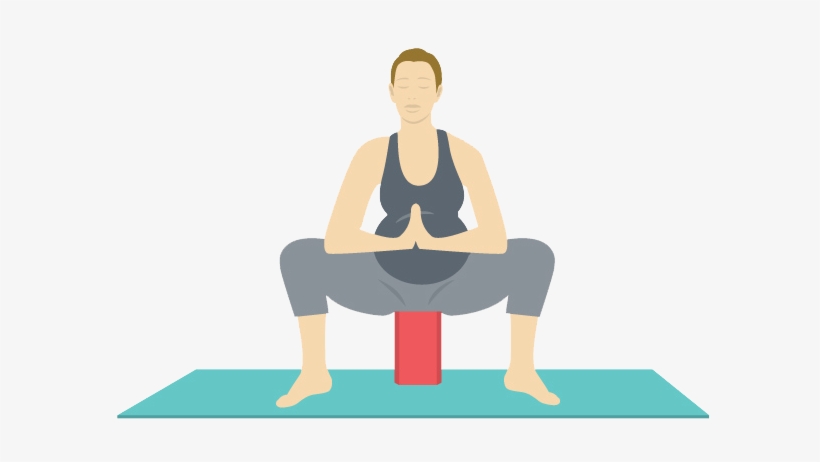
1. Supported Yogi Squat
It is one of the best yoga poses you can do to get immediate relief. Supported yogi squats will help loosen up the outer hips and lower back. Begin by standing up with feet slightly wider than hip-width distance. Make sure you have a block between your feet. Now exhale as you sit back on the block. However, keep the knees pointing in line with the toes. Put your hands on the heart center while using the elbows to open your thighs. Now keep the chest lifted and shoulders down. Hold the position for eight breaths and repeat.
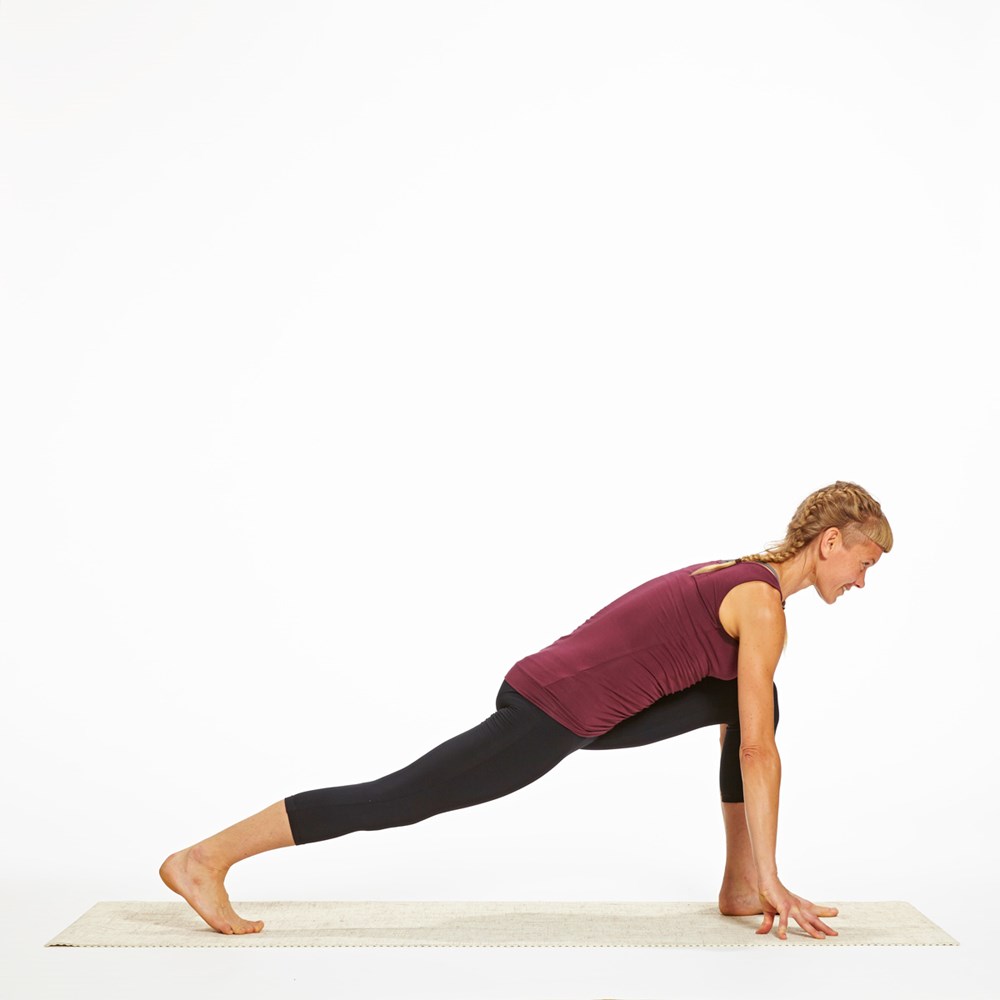
2. Low Lunge
Low lunge is an easy-to-perform yoga pose that will effectively open tight hip flexors. It will even switch your pelvis back in a neutral position. So, here’s how you do a low lunge. Get in a high plank position. Put your left foot between your hands in a way it is perpendicular to the ground. Now, lower the right knee so that it is touching the ground. Most importantly, untuck your right toes. Let the hips sink towards the mat. Try engaging your abs and glutes. Hold the position for eight breaths on either side.

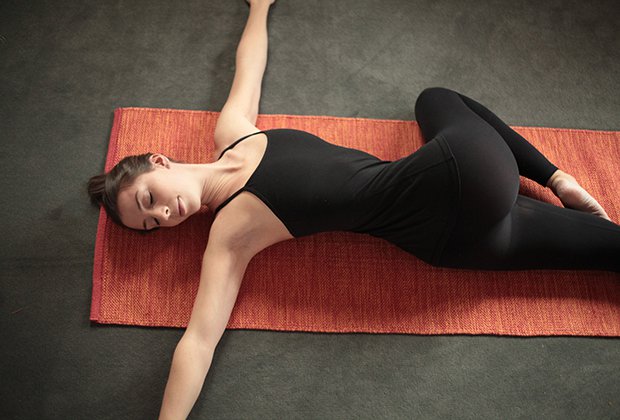
3. Supine Twists
The supine twists help release tension build-up in your spine and hips. To start off with the pose, you should lie on your back on a mat and relax your muscles. Now, you will have to make a T-shape with your arms. You can do that by extending them out to sides and bending the elbows at 90-degree angles. Make sure the hands rest on the ground with palms facing upwards. Now bend the right knee in a way your thigh is perpendicular to the ground. Then cross the right leg over the torso and left leg. While you do that, turn your head and try to look over your right shoulder. Hold the position for eight breaths and then repeat on the other side.
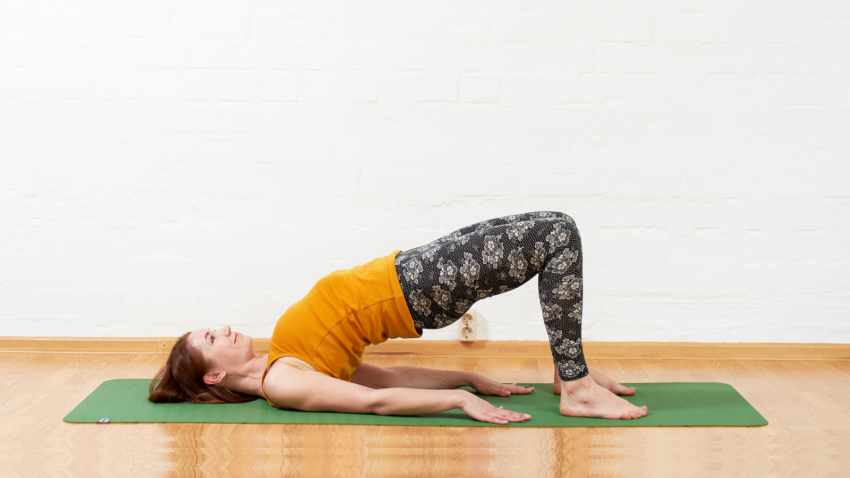
4. Bridge Pose
Looking for the best yoga pose to release the tension in the hip flexor muscles? Bridge pose will never disappoint. It will even help you strengthen your core muscles. Let’s learn how to perform the pose. Begin by lying down on your back and bend your knees. The feet will still be on the ground. Now place your arms alongside your body. Ensure that the palms face down, feet are hip-width apart, and legs are close to your body. Now, inhale as you press your palms into the ground. Lift your hips up for ten breaths, and then slowly bring it down.
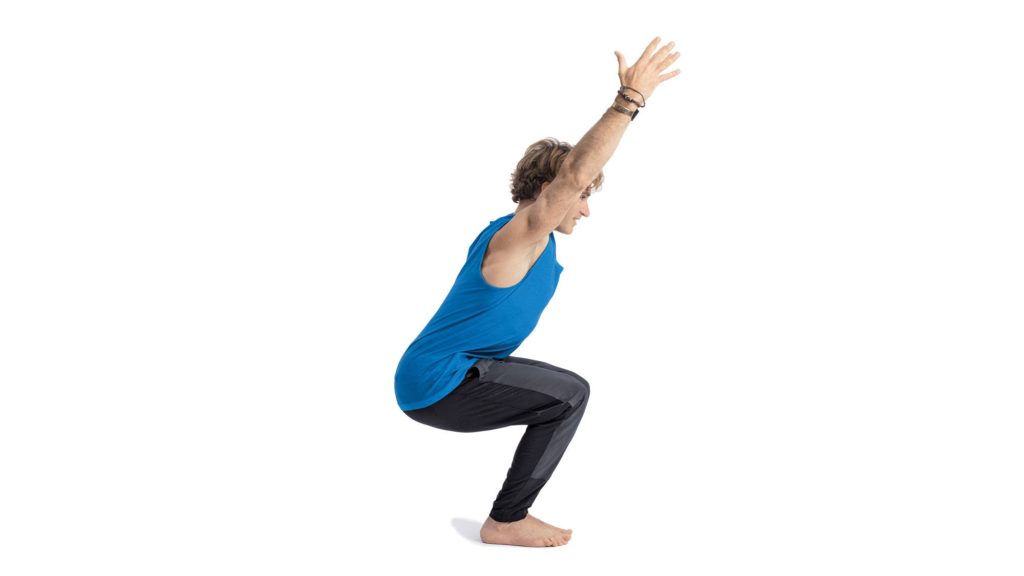
5. Chair Pose
It’s time to practice a yoga pose that will effectively improve your core strength by enhancing your glutes and releasing tension in the outer hips. The chair pose starts with you standing up. Keep the feet together with no space in between. Now bring your palms to your chest. Your spine should be straight as you bend your knee and bring your hips back and down. You will also have to engage your abs to do this pose correctly. Now squeeze your inner thighs while the entire weight is on your heels. Keep this position for five breaths and then repeat.
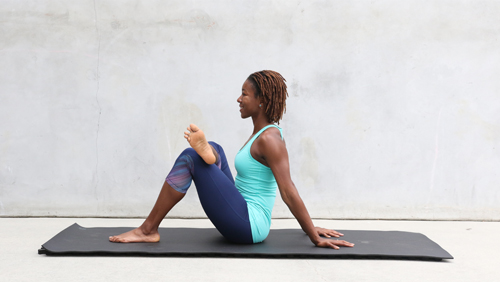
6. Seated Figure 4
This is another easy-to-perform yoga pose that has a significant impact on your hips and connected muscles. You can start by sitting on a mat with your knees bent. The feet should be on the ground. Now put your right ankle on the left knee. You will now want to breathe into your right hip to get a deeper stretch. Hold the position for ten breaths and repeat the pose with the other side.
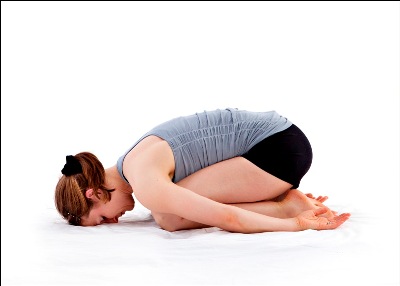
7. Embryo’s Pose
Next on the list is the embryo’s pose which is perfect for releasing tension build up in your lower back and hips. This is a relaxing yoga pose that we recommend you do for ten breaths at a time. Begin by kneeling on your mat, ensuring the legs stay together. Then gently sit back on your heels. This is the perfect position to start lowering your upper body in a way it rests on your thighs. The idea is to bring your forehead as low as you can. Ideally, you’d want your forehead to rest down on the mat. Once you are there, reach your arms back with palms facing up. Breathe in and out ten times as you relax your shoulders.
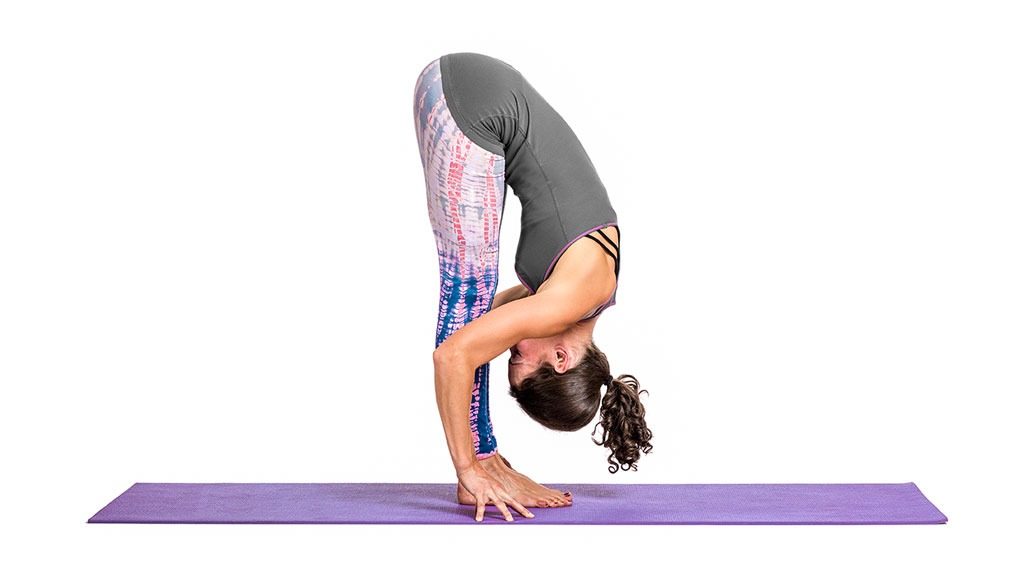
8. Standing Forward Fold
Are you troubled by tight hamstrings? Are your glutes and lower back in pain? You should try the standing forward fold. It’s simple to perform. Just start by standing with feet hip-width distance apart. You will now have to bend your knees as far as you go and engage your abs. Keep the back straight and fold forward at the hips. Keep the knees bent, and try reaching the floor with your hands. Now rest your upper body on the thighs to release tension built in your lower back. Try relaxing on the fold by shifting the maximum weight towards the toes. Doing this for eight breaths will help stretch the hamstrings.

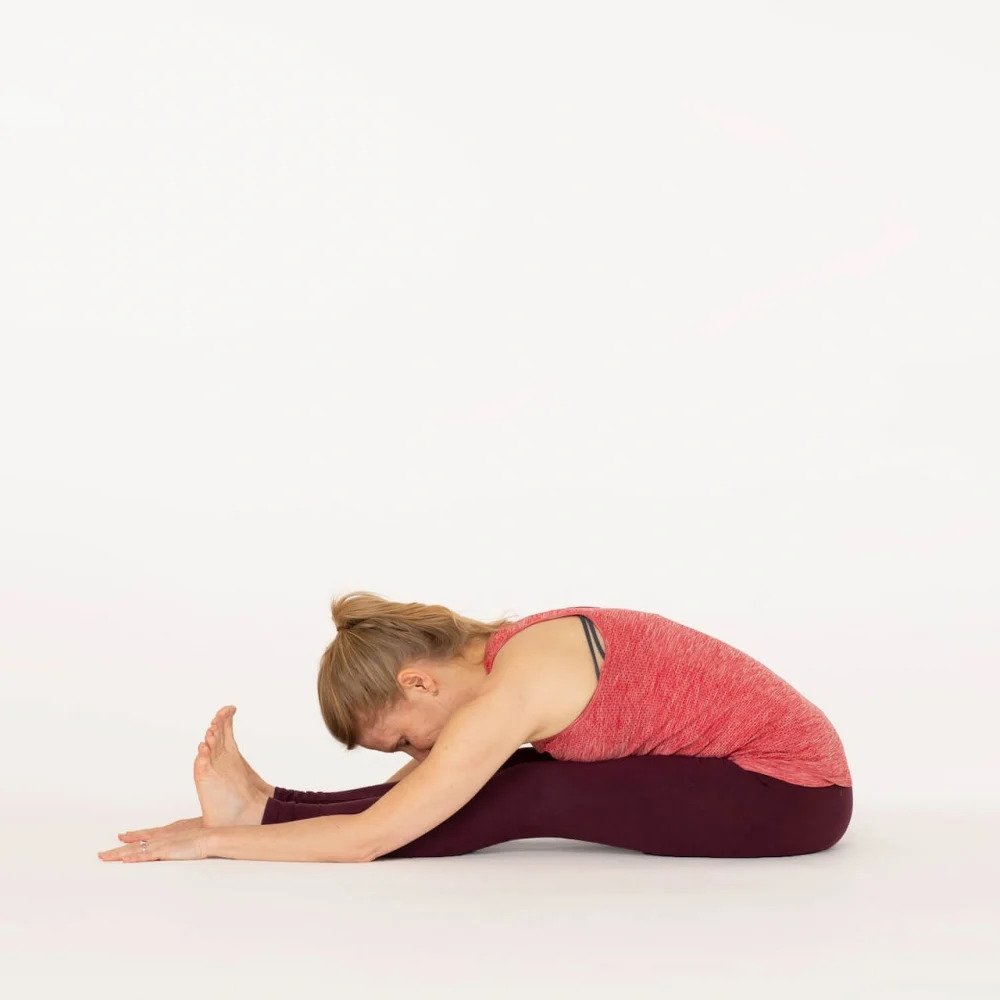
9. Seated Forward Fold
The seated forward fold does magic to your hamstrings and spine as it successfully releases the tension. You can perform the pose by sitting on the floor with your legs straight. The knees, as a result, will be extended instead of locked. Now reach forward towards your feet with your arms. You will want to tuck your chin and neck to help your upper body relax. The check should drop towards the thighs. Hold the position for ten breaths and release.
How often should you do yoga?
You can do yoga as much as your body allows. Indeed, people new to yoga should start slowly (one or two sessions a week) and then ramp up the number of sessions if their body and routine are able to handle it. Professional yoga instructors and other experienced ‘yogis’ practice every day for longer sessions.
What are the benefits of yoga for men?
Men benefit immensely from yoga as it promotes flexibility, mobility, body strength, conditioning, concentration, digestion, and brain function. Yoga helps men get better sleep, have better sex, reduce stress, prevent injuries, and live a happy life.
Best yoga for carpal tunnel
Namaskarasana is the best yoga for carpal tunnel. However, you will want to practice other poses like cat-cow, Salabhasana, and upward-facing dog pose to achieve better results. You should also try wrist exercises to increase the range of extension.
There you have it. Lower back and hip pain can disrupt the flow of your life and make things miserable. Moreover, the pain can worsen with time and trigger other health-related problems. It’s better you cure the pain naturally through the yoga poses mentioned above. Which yoga pose did you find the most effective? Let us know in the comments. Also, don’t forget to check out other informative posts on the blog!